


Setup Junos PyEZ and Write Your First Program
Junos PyEZ is an automation tool that enables you to manage and automate Junos OS devices. It's an open-source Python library, maintained by Juniper Networks, providing Python with micro-framework, home to many APIs, for most of your automation requirements.
How do I connect to devices using Junos PyEZ?
Junos PyEZ enables you to connect to your Junos devices in several ways, dependent on your requirement:
- serial console port;
- telnet;
- SSH (via a console server);
- NETCONF session over SSH.
What do I need to install Junos PyEZ?
Firstly, you need a Unix-like operating system or a Windows Operating system. Before installing Junos PyEZ, you’ll also need to be running one of the following Python versions:
- Python 2.7;
- Python 3.5+ (use Python3 as Python2 support is being deprecated as of Junos PyEZ 2.6.0).
If you want to avoid installing the Junos PyEZ dependencies separately, you should install pip; pip is a package installer for Python packages. If you’re using Python3, then you would be using pip3 to install your packages.
Installing Junos PyEZ
Junos PyeZ can be installed in three different ways:
- Directly on the server - making the package globally accessible.
- Python virtual environment – The package is contained and not accessible outside of the virtual environment.
- Docker container – Software containers used to run the application and its dependencies.
Installing Junos PyEZ in a virtual environment
For this tutorial, we’ll be installing the package in a virtual environment on Ubuntu 20.04 LTS using Python 3.8.
Creating a virtual environment has some prerequisite software:
- sudo pip3 install virtualenv
- sudo apt install python3-venv - Not included in a lot of; documentation, but when I created a virtual environment, there was an error message of failing commands;
- mkdir genja-tutorials - Navigate to the directory you plan to use for your new virtual environment in the terminal, create a new folder; I have done this in my home folder;
- cd genja-tutorials – navigate into the new folder;
- mkdir PyEZ – Create a new directory for your project;
- python3 -m venv PyEZ – Create a virtual Python installation; venv will usually install the latest version of Python installed on your machine;
- source PyEZ/bin/activate – Activate your virtual environment;
- pip3 install junos-eznc – install Junos PyEZ.
sudo pip3 install virtualenv
sudo apt install python3-venv
mkdir genja-tutorials
cd genja-tutorials
mkdir PyEZ
python3 -m venv PyEZ
source PyEZ/bin/activate
pip3 install junos-eznc
How do I confirm the package has been installed?
Confirming the package has been installed in your Python venv can be completed in two ways.
- pip3 list – ran within the current terminal view, you should see junos-eznc and several other packages, as it has some dependencies, i.e., Jinja2, PyYAML, etc.;
- from jnpr.junos import Device – Start python3 and then import the module. If successful, there will be a blank new line.

Do I need to do anything on my Junos device?
Yes, however, there is no requirement of having to install any client software on the device. Depending on how you connect, you need to ensure the service is enabled. On this occasion, we'll connect to the device using a NETCONF session over SSH.
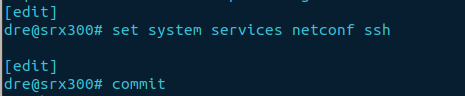
Enabling NETCONF-over-SSH by logging into your Junos device:
- set system services netconf ssh - By default, NETCONF is not enabled. It uses TCP port 830 (default). Note: this is the minimum configuration. If you have any firewall rules, you’ll need to add them accordingly to allow TCP port 830;
- commit – saves the configuration.
Writing your first program using Junos PyEZ
Head back to the Ubuntu terminal and navigate into the PyEZ directory.
- cd PyEZ – if you have been following along, you would have created two folders as follows; home/genja-tutorials/PyEZ;
- touch connect.py - create a Python module file;
- vim connect.py - open the file for editing (you can use any other text editor of your choice).
cd PyEZ
touch connect.py
vim connect.py
Python code for basic PyEZ connectivity
Below is an explanation for some of the keywords used in the code:
- from jnpr.junos import Device - imports a Python class from the PyEZ package, used to communicate with the device
- from getpass import getpass - if you're security conscious and don't want to store your password in plain text, or have it show while typing it into the terminal use getpass to obtain a variable
- import jnpr.junos.exception - imports the exception module used to handle some of the exceptions
- ipadd, username and password - are all variables used to gather the information required to initiate your connection
- try-except - known as a try-except clause, nesting the code inside a try-except statement allows you to handle an exception without terminating the whole program and provide detailed feedback
- with - open and close the connections without having to specify the keywords open and close;
- as - provides an alias, here we use
devas the alias - dev.connected - returns a boolean value on connection status
- except jnpr.junos.exception.ConnectAuthError as autherr: - an exception is raised if there is an authentication error for the username or password
from jnpr.junos import Device
from getpass import getpass
import jnpr.junos.exception

ipadd = input('Enter hostname or IP address: ')
username = input('Enter username: ')
password = getpass('Enter password: ')

try:
    with Device(host=ipadd, user=username, password=password) as dev:
        print('Are we connected?', dev.connected)
except jnpr.junos.exception.ConnectAuthError as autherr:
    print('Check username and password', autherr)
You can also download the code from GitHub
Within your current directory, you can download it with the following command:
wget https://raw.githubusercontent.com/Smertan/junos-pyez/main/connect.py
Start your Python program
Save the code to the file, and exit back out to the terminal. To start the program, use the command below. If required, replace the filename as necessary.
python3 connect.pyYou should get a similar output as shown below; if successful.
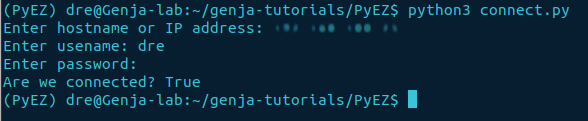
Well done, you just created your first program!
How to exit a Python virtual environment
We have now successfully installed Junos PyEZ and written our first program. Time to exit our virtual environment.
It's just one simple command:
deactivate – The venv folder named “(PyEZ)” will no longer show on the left-hand side of the terminal.
deactivate
Stay in touch
Signup if you like the content to maintain access to all blogs; also, don't forget to try out the Genja demo.