


Discover the benefits of using Git and hosting your own server
What is Git?
Git is an open-source version control system (VCS) and provides continuous integration (CI). Well, not just a version control system. It is a distributed version control system (DVCS) with plenty of features.
What do I mean by distributed?
Rather than having a central repository containing the full source code, a developer clones the repository taking a full backup before making any changes. This means there is no single point of failure, making recovery less stressful if you suffer corruption.
What is Continuous Integration (CI)?
Continuous Integration (CI) is a software development practise where developers integrate code into a shared repository frequently, preferably several times a day. Each integration can trigger an automated build process that can build, test, and validate changes.
Tests can also be run locally on the developer's machine at various points within the lifecycle, i.e., pre-commit, pre-push, pre-merge, etc.
In git, it is implemented with scripts placed within the git.hooks/ directory. Locally client-side and from the server-side shared repository, e.g., project.git/hooks.
There are a different set of hooks for both client-side and the serverside:
Client-side:
- pre-commit
- prepare-commit-msg
- pre-push
- post-checkout
- pre-rebase
- pre-applypatch
- post-applypatch
- post-rewrite
- post-commit
- post-merge
Server-side:
- pre-receive
- update
- post-receive
Installing Git
After that brief introduction, we can get hands-on and start by installing Git. I use a Unix-like OS. Well, specifically Ubuntu/Debian, so the commands will be based on that environment. Install Git on both the client machine and server, if not done already.
sudo apt install gitCreate a new user account
Create a new user account on the server for the git repositories. Being creative, let's name the account git. It can be anything you choose. The aim is to have one account to store the repositories.
sudo adduser gitFollowing the prompts, set the password.
Confirm new user account
Login as git and list the current home directory
sudo su - git
ls -la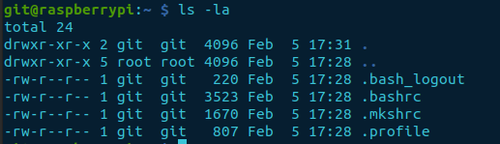
If this is a default setup, there shouldn’t be the .ssh/ directory in the output. The next step will create the relevant directory and files.
Create SSH keys
First, confirm you have regular password authentication access via ssh from the client machine.
Client-side
ssh git@10.12.120.5Next, create a set of SSH keys on the client machine and copy the public key over to the server to the git account. I have a detailed blog called How to Create SSH Keys explaining the details, and how to disable password authentication on the server.
Client-side
ssh-keygen -f ~/.ssh/id_git -t rsa -C “git@10.12.120.5”
ssh-copy-id -i ~/.ssh/id_git git@10.12.120.5
Confirm transfer
ssh-copy-id should have created an ~/.ssh/authorized_keys file. Confirm a copy of the public key has been transferred and has the comment git@10.12.120.5 at the end. The IP address should be the one for your server.
Server-side
cat ~/.ssh/authorized_keysIf you read the previous blog and disabled password authentication within the /etc/ssh/sshd_config file, you may want to add the ssh key to the ssh-agent on your client.
Client-side
ssh-add ~/.ssh/id_gitTest remote access with key
If you added the key to the ssh-agent, you don’t have to specify the option -i path/to/filename.
Client-side
ssh -i ~/.ssh/id_git git@10.12.120.5Create a new Git repository
We’ll create a new directory with the home folder of the git account and initiate a new bare repository.
Server-side
mkdir project.git
cd project.git
git init --bare
A bare repository is created without a working tree. This means just the contents of the .git/* directory is created and not the .git/ directory itself. This setup doesn’t allow you to make changes directly on the server. Perfect for a shared repository without the requirement of local development.
Using the tree command, we can show the directory structure of a bare repository.
tree -aOption -a is used to include hidden files too.
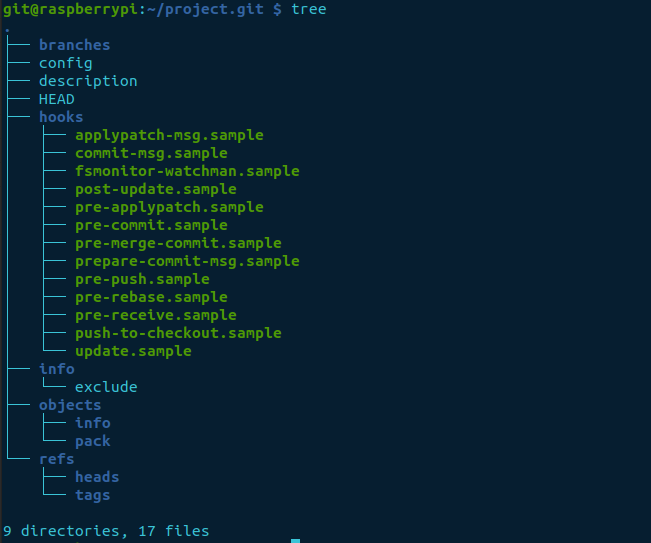
Note: Each time a new bare repository is required, you need to log into the server and create it.
Create a local repository
Create a new folder and initiate a local repository on the client machine with git init.
Client-side
mkdir test_git
cd test_git
git init
View the current directory in its initial state. Executing the command, ls without any options, the directory will appear empty. But, including option -a, it shows all files as well as the hidden ones. Hidden files are prepended with a . (period) before the name.
ls -la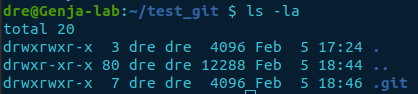
Add a file to the repository
We will add the .gitignore file. The file specifies which directories and files are not to be included when pushed to the server. For example, directories and files such as *.log, __pycache__/, etc., may want to be ignored as they are irrelevant to other developers.
Download the .gitignore file from GitHub for Python from Python.gitignore. I find it a fantastic boilerplate example. You can edit it or even create your own version.
wget -O .gitignore https://raw.githubusercontent.com/github/gitignore/main/Python.gitignoreNote: Use the -O .gitignore (capital letter O) option to copy the contents to the named file .gitignore. Otherwise, the file will be the original name Python.gitignore.
Confirm and start tracking the file
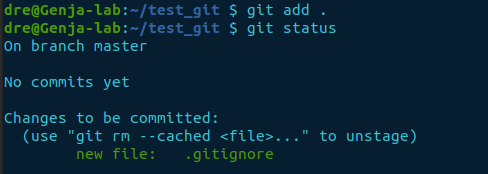
When you create a new file within the repository, it is classed as an untracked file. You list the file(s) or check the git status.
Let’s do both.
ls -la
git status
Response from git status
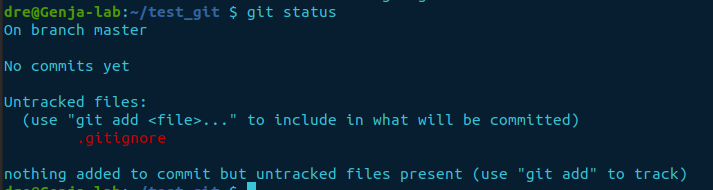
Both commands list the new file .gitignore. However, git status gives us a clear indication of the file not being tracked.
Add the file
To start tracking and include it in the repository, use the git add <filename> command. Or, for all files, use either of the commands below.
git add .git add --all
We’ll use git add ., it requires less typing.
git add .Confirm the file is now being tracked by rechecking the status.
git statusThe response has now changed after adding the file, using git add .. It lists the files to be committed.
How to commit changes
A git commit saves the changes to a timeline. Essentially, creating a snapshot of the current state and a record. Option -m gives us the opportunity to and a note to the commit.
git commit -m “Initial commit added .gitignore”The response shows how many files were changed and changes/insertions with the file.

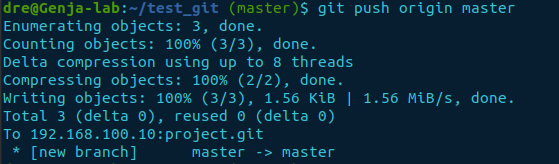
Changes have now been saved locally, but not to the shared repository. We need to push the changes up to the server using git push <remote> <branch>.
How do I connect to a git server?
We need to add a remote connection to the configuration. Using git remote add <name> <url> it updates the .git/config file with the connection details, but doesn’t attempt to connect just yet.
git remote add origin git@10.120.12.5:project.gitYou can check the details by viewing the .git/config file. Or by using git remote with option -v for verbose to obtain a little bit more of a detailed output.
git remote -v
Push the change
As we haven’t even touched branches yet, the branch name of our current instance is master. The command to push is git push <remote name> <branch> as used below.
git push origin master
Checking the shared repository
We’ve successfully added a file and pushed the change to the shared repository. Let’s have a look at the project.git directory to see if we can see the files.
Server-side
cd project.git
tree -a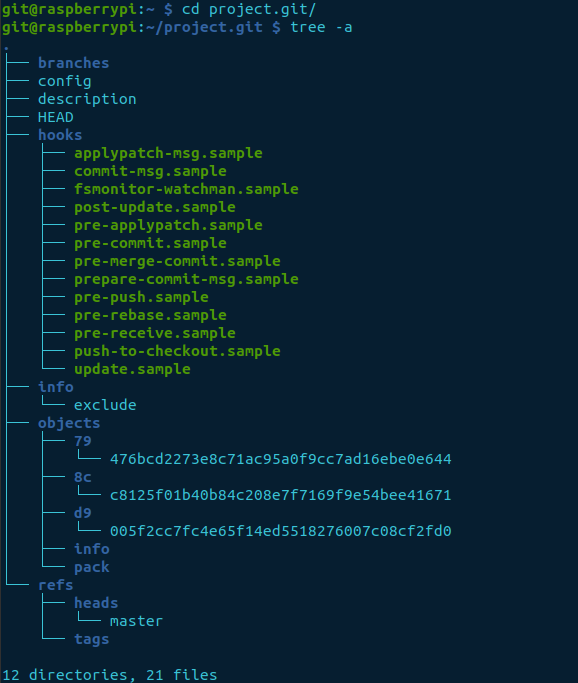
The output displays three objects generated. It contains a tree, blob, and commit.
- tree – contains a reference to the blob, and other trees
- blob (binary large object) – only contains the file contents, not the name of the file
- commit – points to a tree and parent details if there was a previous commit. The commit message and details
entirety
Git stores the information as snapshots. If an update is made to an existing file, the snapshot taken contains the entirety of the file when committed and pushed. The new commit object has a parent referencing the previous commit object. A commit without a parent is the root.
Cloning a repository
Suppose you want someone to now have access to the project. They would need to clone the shared repository. We’ll emulate this by creating a new directory and cloning it on the client machine.
Client-side
mkdir clone
cd clone
git clone git@10.12.120.5:project.git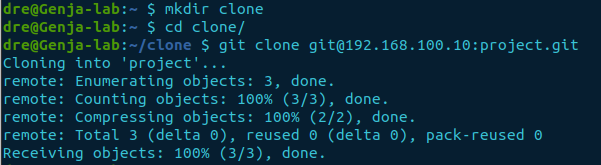
If successful, you should now have a clone of the shared repository with a directory named project. Then is derived from the repositories folder name minus git.
Finally, we’ll view the contents of the projects directory using ls -la.
cd project
ls -laConclusion
We now have a fully functional private Git server for distributed version control and collaboration. Next up will be how to use Git’s features.