


Securely install Jenkins for your CI/CD environment
What is Jenkins?
Jenkins is an open-source CI/CD (continuous integration/ continuous delivery) server. It can be used solely as a CI server or turned into a CD server for your projects. Jenkins even goes as far as continuous deployment.
What’s the difference between continuous delivery and deployment?
Basically, they are almost identical apart from the deployment of code into production after passing the acceptance tests. Continuous delivery deployment is manual, but continuous deployment is automated.
Prerequisites of Jenkins
Jenkins requires Java to be able to run. OpenJDK is the most popular Java implementation. Again there are many different versions of the OpenJDK package. But at the time of writing, Java 8 and Java 11 are the preferred versions. We’ll install Java 11 using apt.
sudo apt update
sudo apt install openjdk-11-jre
Note that the Java installation takes up about 700MB of disk space if you’re on a budget.
Installing Jenkins
On Debian-based distributions like Ubuntu, you can install Jenkins using apt. Because Jenkins has its own repository, the details need to be available to the server.
Adding a new repository
One of the first things to achieve this is to add the repository's public key. The key is used by apt to verify packages making them appear as trusted if authenticated. By default apt does not accept unsigned packages. The command below adds the key to a list of keys used by the repository, which can be viewed using the apt-key list command.
wget -q -O - https://pkg.jenkins.io/debian-stable/jenkins.io.key \
| sudo apt-key add -
Update the repository source list
Add the Jenkins repository source address to a file in the directory of /etc/apt/sources.list.d/. The main source list file is /etc/apt/source.list. Separating the new address makes it easier to manage.
sudo sh -c 'echo deb http://pkg.jenkins.io/debian-stable binary/ \
> /etc/apt/sources.list.d/jenkins.list'
Update apt
We need to update apt so it can pull the information from the new repository to provide us with a list of available packages.
sudo apt update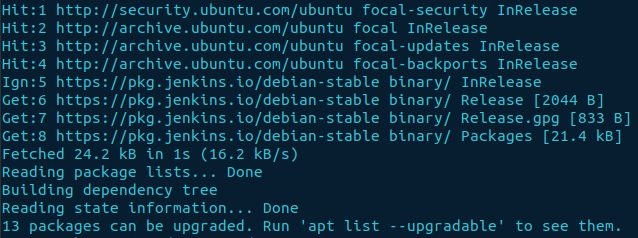
Install Jenkins with apt
This is the easy part
sudo apt install jenkinsStart Jenkins
To start up the Jenkins daemon, we need to use systemctl to start the service.
sudo systemctl start jenkinsCheck the status of Jenkins to ensure it works correctly.
sudo systemctl status jenkins
Set firewall settings
If the firewall is not enabled, it would be advisable to enable it and add ssh and port 8080, which is the default port for Jenkins.
sudo ufw allow ssh
sudo ufw allow 8080
Now enable the firewall with the following command and confirm the status.
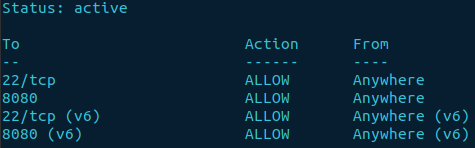
sudo ufw enable
sudo ufw status
The output should show the ports we just allowed and the status active.
Confirm access to Jenkins
The first time you start up Jenkins and login via the URL http://ip_address_or_domain_name:8080. It displays an unlock page.

Before moving on by unlocking Jenkins, we want to secure the connection as all communication at present is in cleartext.
Encrypting Jenkins with TLS/SSL
By default Jenkins doesn’t have a secure connection. Any data transmitted is in clear text, i.e., usernames and passwords. To secure Jenkins we need to add TLS/SSL certificates and use HTTPS to encrypt the connection between the client and server.
To use TLS/SSL encryption in this instance, we’ll be installing a webserver to act as a reverse proxy. My preference is to use Nginx. Other web server software is available. However, the instructions are for Nginx.
Install Nginx
sudo apt install nginxAdjust the firewall settings to allow Nginx.
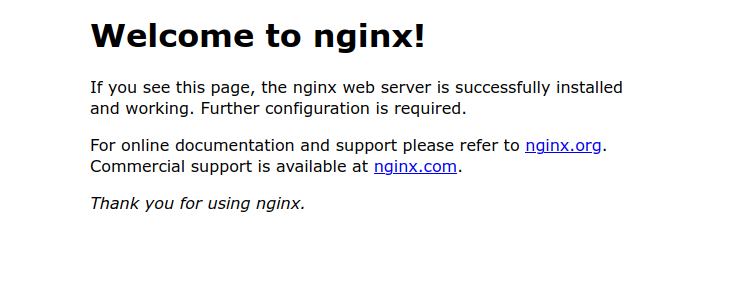
sudo ufw allow “Nginx Full”The keyword "Nginx Full" has allowed traffic for port 80 HTTP (unencrypted) and port 443 HTTPS (TLS/SSL encrypted). Test HTTP access to Nginx and confirm the service is running.
sudo ufw allow “Nginx Full”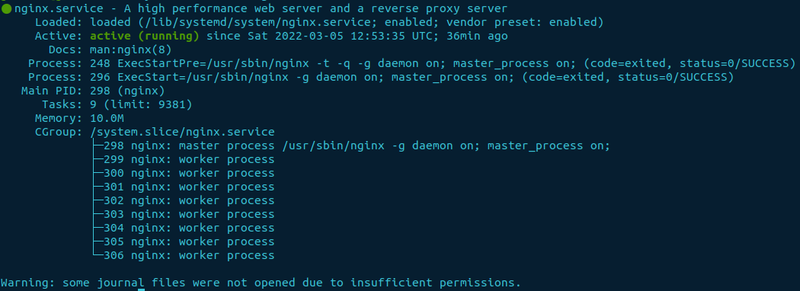
In a web browser, enter the IP address or Hostname of the server. You should see a “welcome to nginx!” page.
Create a TLS/SSL certificate and key
Transport Layer Security (TLS) certificates, also known as Secure Sockets Layer (SSL), are based on public certs and private keys.
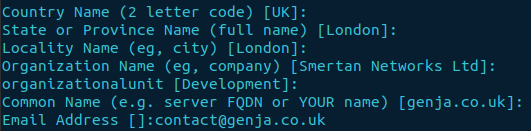
Using openssl, we can create the certification and key and provide it with a configuration file overriding the defaults and supplying added detail. It comes in handy when adding the certificate to chromium browsers such as Chrome, Safari, Edge, etc.., as they don’t trust it when added as subject alt name is missing if you wish to get rid of the annoying red triangle in the address bar.
A template version of the configuration file can be downloaded from my GitHub repository.
wget https://raw.githubusercontent.com/Smertan/jenkins/main/tls-ssl/openssl_selfsigned.confOnce the download has been completed, there is a small change required. Replace the altname IP.1 at the bottom with your server's IP address.
openssl_selfsigned.conf
[alt_names]
IP.1   = 10.120.12.5
If you downloaded the file to your current working directory, run the command below. It will use the configuration file we just downloaded, prompted by the -config option.
sudo openssl req -x509 -nodes -days 365 -newkey rsa:2048 \
-keyout /etc/ssl/private/nginx-selfsigned.key \
-out /etc/ssl/certs/nginx-selfsigned.crt \
-config openssl_selfsigned.conf- -keyout: provides the output location for the private key
- -out: provides the output location for the certificate. Otherwise, the output is sent to stdout
- -x509: create a public key certificate and private key pair
Create a new Diffie Hellman group
Perfect Forward Secrecy (PFS) utilises Diffie Hellman in creating a shared secret between a client and server. Diffie Hellman is an algorithm that allows two parties to securely exchange a shared key over an untrusted network.
A recommendation is to generate a 2048-bit group. If you would like more information, check out the link. https://weakdh.org/sysadmin.html.
The simplest way of generating a new group is to use OpenSSL.
sudo openssl dhparam -out /etc/ssl/certs/dhparam.pem 2048It will take a moment to create the key. The higher the bit rate, the longer it takes.
Make Nginx aware of the SSL certificate location
The information will be created in the /etc/nginx/snippets/ directory and can be called in the site configuration with the keyword include.
sudo vim /etc/nginx/snippets/self-signed.confAdd the two lines of text and save.
ssl_certificate /etc/ssl/certs/nginx-selfsigned.crt;
ssl_certificate_key /etc/ssl/private/nginx-selfsigned.key;
The two lines in the file will make Nginx aware of where to look for the certificate and key, respectively.
Setup Nginx securely to use SSL
Next, the configuration below sets strong SSL security on the Nginx web server. It's advisable to download the file from my GitHub repository as there is quite a bit of text.
Download from GitHub
sudo wget -O /etc/nginx/snippets/ssl-params.conf \
https://raw.githubusercontent.com/Smertan/jenkins/main/tls-ssl/nginx/ssl-params.conf
Once the file has finished downloading, nothing else needs to be done, as the file has copied into the location /etc/nginx/snippets/ssl-params.conf
Confirmation
ls -l etc/nginx/snippetsCopy and paste
The other option is to create the file and copy and paste the below. Skip to Configure Nginx for HTTPS if you downloaded it from GitHub.
Create file
sudo vim /etc/nginx/snippets/ssl-params.confPaste in text
# from https://cipherli.st/
# and https://raymii.org/s/tutorials/Strong_SSL_Security_On_nginx.html

ssl_protocols TLSv1.2 TLSv1.3;
ssl_prefer_server_ciphers on;
ssl_ciphers "ECDHE-RSA-AES256-GCM-SHA512:DHE-RSA-AES256-GCM-SHA512:ECDHE-
RSA-AES256-GCM-SHA384:DHE-RSA-AES256-GCM-SHA384:ECDHE-RSA-AES256-SHA384";
ssl_ecdh_curve secp384r1;
ssl_session_cache shared:SSL:10m;
ssl_session_tickets off;
ssl_stapling on;
ssl_stapling_verify on;
resolver 8.8.8.8 8.8.4.4 valid=300s;
resolver_timeout 5s;
# Disable preloading HSTS for now.  You can use the commented out header
# line that includes the "preload" directive if you understand the implications.
#add_header Strict-Transport-Security "max-age=63072000; includeSubdomains; preload";
add_header Strict-Transport-Security "max-age=63072000; includeSubdomains";
# X-Frame-Options Caused an error during first admin user creation and instance
# add_header X-Frame-Options DENY;
add_header X-Content-Type-Options nosniff;
# Points to the newly created Diffie Hellman group.
ssl_dhparam /etc/ssl/certs/dhparam.pem;
The final line in the file uses the Diffie Hellman key we created earlier.
Configure Nginx for HTTPS
Configure Nginx to use HTTPS and not HTTP by redirecting the traffic using return 301 to the HTTPS URL. Copy the configuration below or download the template from GitHub.
Download from GitHub
wget https://raw.githubusercontent.com/Smertan/jenkins/main/tls-ssl/nginx/jenkinsReplace "<yourServerAddress>" with your domain name or IP address inside the Jenkins file downloaded. A quick way of accomplishing the task is with sed. sed is a command-line tool in Unix/Linux used to find and replace text just like below.
sed -i.bak “s/<yourServerAddress>/10.120.12.5/g” jenkinsThe command replaces <yourServerAddress> with 10.120.12.5 and create a backup file named jenkins.bak.
Finally, move it into the correct directory.
sudo mv jenkins /etc/nginx/sites-available/jenkins
Enable site
we need to create a symbolic link from /etc/nginx/sites-available/ to /etc/nginx/sites-enabled/ for the jenkins configuration file to make it live.
sudo ln -s /etc/nginx/sites-available/jenkins /etc/nginx/sites-enabled/jenkinsRemove the default symbolic link in sites enabled as it causes a conflict.
sudo rm /etc/nginx/sites-enabled/defaultTest the nginx configuration to ensure the syntax is correct.
sudo nginx -tIf it returns ok, it means the configuration file is correct.
For Jenkins to work with Nginx due to the proxy_pass configuration we just added in the site file. Jenkins needs to be listening on the localhost rather than all (0.0.0.0). Let’s modify the /etc/default/jenkins file by locating the line JENKINS_ARGS.
sudo vim /etc/default/jenkinsAppend --httpListenAddress=127.0.0.1 at the end of the line in-between the quotes after --httpPort=$HTTP_PORT highlighted above. It should be at the bottom of the file.
--httpListenAddress=127.0.0.1Restart the services
As we modified the configuration for both Nginx and Jenkins, we need to restart the services.
sudo systemctl restart nginx jenkinsUnlocking Jenkins
Log back into Jenkins via the URL http://ip_address_or_domain_name without port 8080. It will redirect you to an HTTPS connection. There will be a warning page, accept the risk to proceed. The message is due to the self-signed certificate we are using.
To unlock Jenkins a password needs to be entered into the input field. The password can be found in two places, such as the log files /var/log/jenkins/jenkins.log or /var/lib/jenkins/secrets/initialAdminPassword.
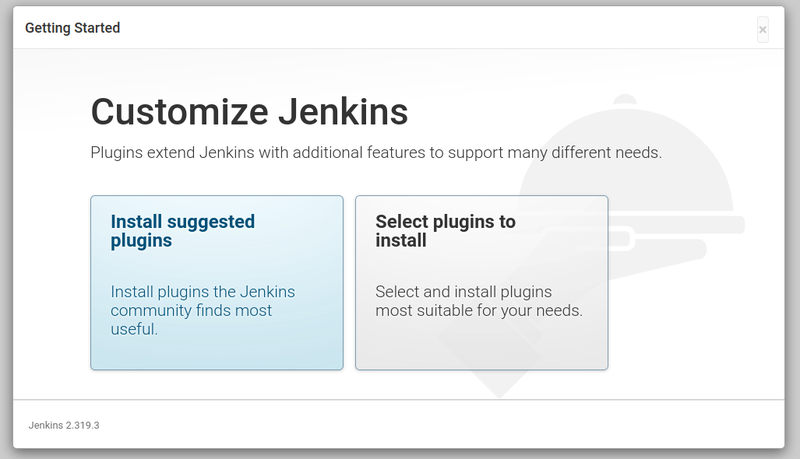
Install plugins Jenkins
Select install suggested plugins and Jenkins will start installing them.
Create an admin user
After the installation of the plugins, it’s time to create your first admin user. We have already ensured the data transmitted is encrypted, so the username and password won’t be sent in cleartext.
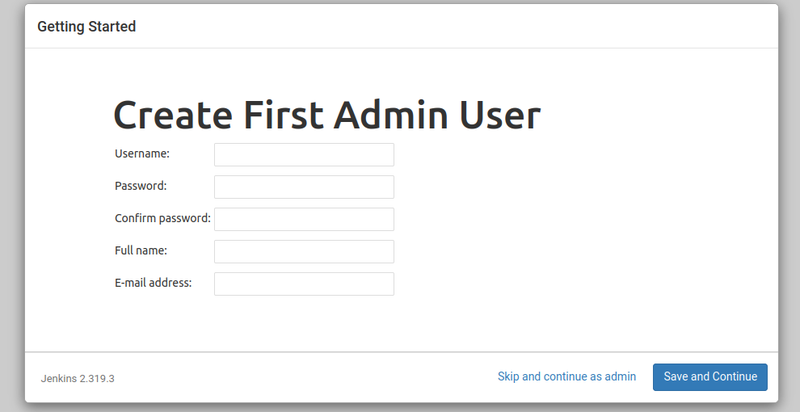
Enter your details, then save and continue.
Configure the URL
Set the root URL for Jenkins. Enter the domain name or IP address of the server.

Save and Finish
Startup Jenkins
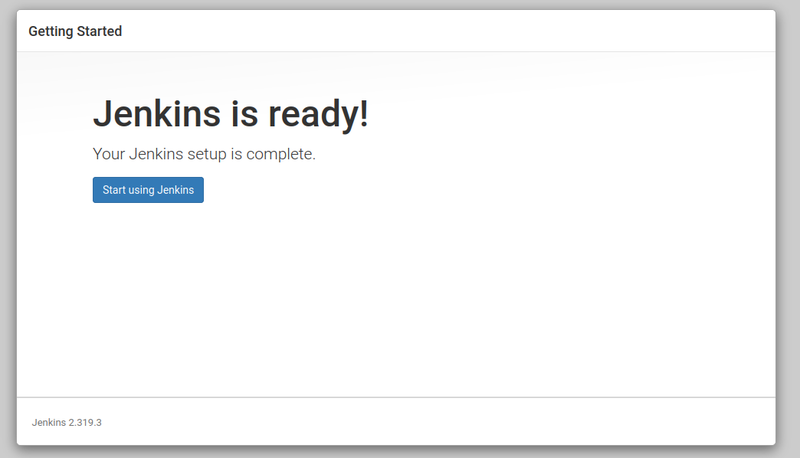
Click Start using Jenkins.
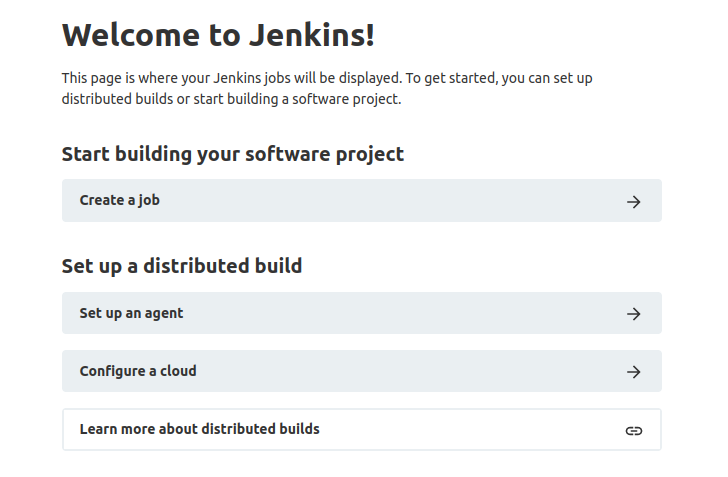
Create a freestyle project
Next, create a freestyle project and name it, First Jenkins project in the item name box.
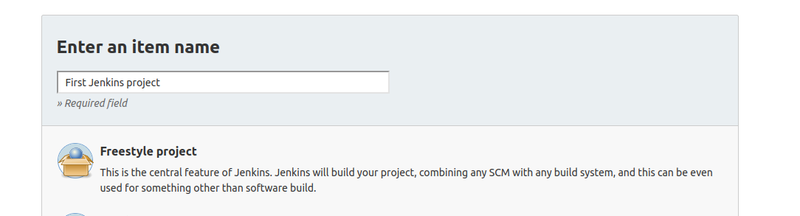
Click OK once done.
Create the build
Select Execute shell from the build section add build step drop-down menu.
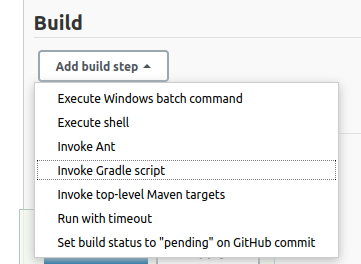
Then add the following command into the command box.
echo "This is the date and time $(date)" >> date_time.txtsave
Go back to the Dashboard, top left corner.
Run the build
Then click the build icon next to the job highlighted below.
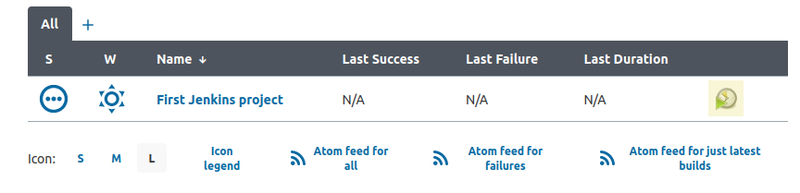
Next, check the build history.
Check the result
If the job was successful, it should have a green checkmark next to it. The console can be viewed using the green icon on the far right.
The output should resemble the screenshot below.
Viewing the actual file
To view the actual file, open it in a text editor. Jenkins has put it into the current workspace named after the project name (First Jenkins project).
vim "/var/lib/jenkins/workspace/First Jenkins project/date_time.txt"
Running the build again will append the current date and time text to the file. Try it and check the result.
Conclusion
Now we have Jenkins installed. We can discover what else it can do. One topic that comes to mind is integration with Ansible and Git.